
I Built A Wireless Dactyl Manuform
Table of Contents
Over the holidays, I decided as a side project to build a dactyl manuform keyboard. I recently got a 3D printer for christmas so I thought this would be a good way to put it to the test! That's when I came across the dacyl manuform ergonomic keyboard which you can build with only 3d printed parts and electronics from Aliexpress.
What Is A Dactyl Manuform?
It is not a type of dinosaur as the name might imply. A dactyl manuform is an ortholinear split ergnomic keyboard. The keyboard has many features that break it apart from a traditional qwerty keyboard. The structure is concaved inwards to enable your fingers to easily reach each key, it is an ortholinear keyboard which means the keys are not staggered diagonally but instead the columns are straight, and it has thumb clusters to make your thumbs do more work hitting special characters instead of just the spacebar. It is also split into two pieces to avoid shoulders strain and RSI related issues.
There are multiple layouts and customization options for the keyboard that you can choose from. A great website which you can use to generate STL files is here. I opted for a 4x5 size with a default layout as I have pretty small hands.
The Parts
To build the keyboard, you need the following parts which almost all can be bought for very cheap from Aliexpress. Some of the parts I bought in bulk but you most likely won't need as much for the actual build:
| Product | Price |
|---|---|
| 2x Dactyl Manuform 3D printed cases | $26 |
| 46x Gateron Milky Yellow's Switchrs | $17 |
| 2x NRF52840 Boards (nice!nano v2 knock-off) | $23 |
| 46x Diodes | $2 |
| 20x Jumper wires | $7 |
| 2x USB-C extension cable | $8 |
| 2x 2000mah 3.7v battery | $11 |
| 2x Power Switch for Battery | $1 |
| 10x Heat Sink Screw Insert M3 | $3 |
| 10x M3 10mm Screws | $2 |
| 2x Micro buttons | $1 |
| Total | $101 |
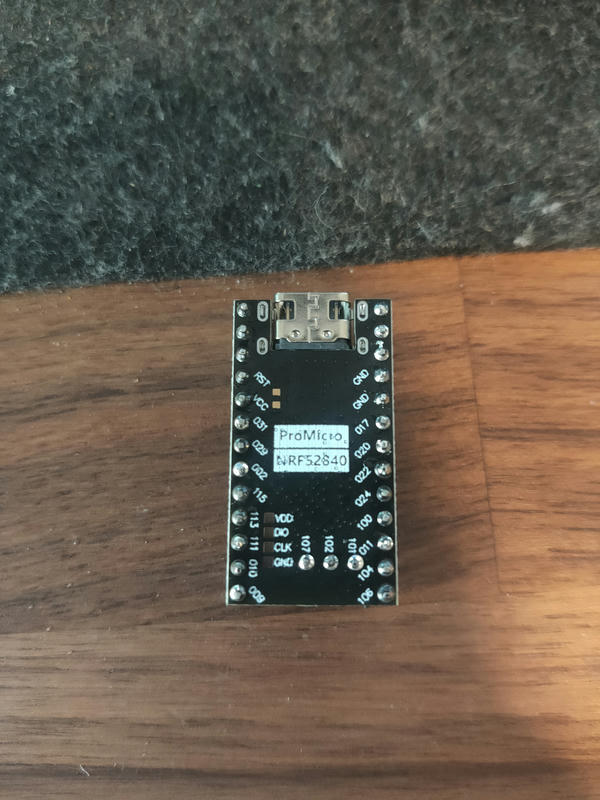
I opted to use nice!nano v2's as the micro controller for each half of the keyboard. With a typical wired dactyl manuform, pro micros are normally used as the controllers. Because a typical pro micro does not have any wireless capabilities, I had to use the nice!nano's. Both micro controllers are essentially the same except the nice!nano has bluetooth support which is what I will need to allow me to connect the keyboard to my devices without a cable.
All these parts along with basic electronics tools like a soldering iron, solder and flux is all you need to start building the keyboard. The parts are very affordable, it's just a matter of allocating a good amount of your time to build the finished product.
The Case
Sanding
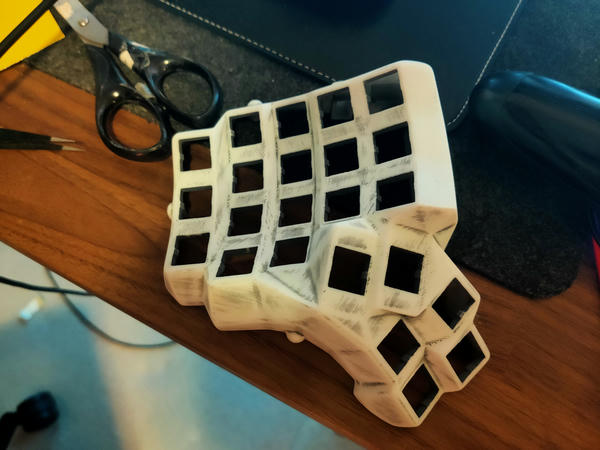
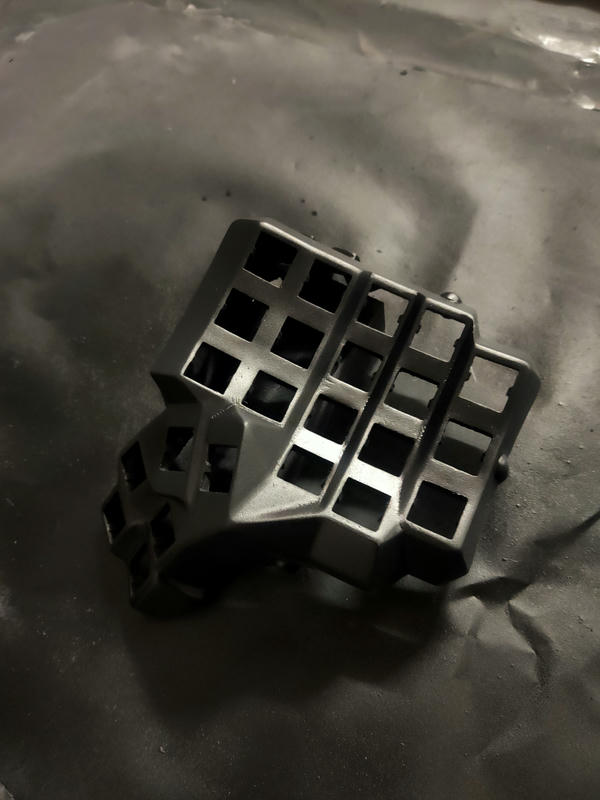
Before I began to assemble the keyboard, I opted to sand and paint the case. This is a totally optional step. You can just print the case and start assembling but I wanted to remove the layer lines from the print and get a nice smooth surface.
I first started with 80 grit sandpaper to remove most of the layer lines, then I went to 120 grit then 240 grit and then finally 600 grit wet sanding. My first runthrough this process I wasnt happy with the result after priming, so I restarted from zero and did the sanding again.
Take your time with this process. If you want a really nice finish at the end, then it's worth spending the extra hours to sand the print down. If you cut corners and put less effort into sanding, it will for sure show in the painting process.
Painting
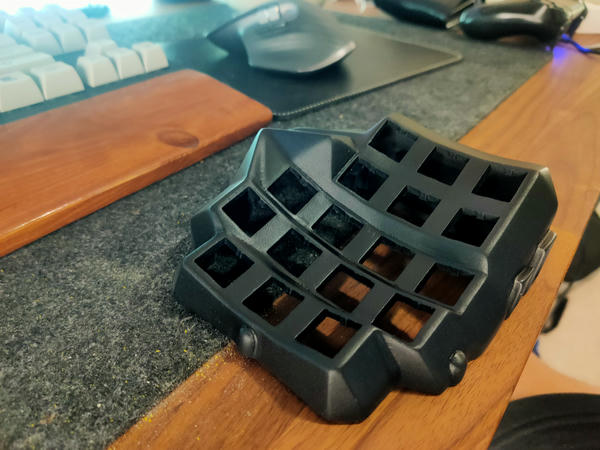
After a weekend of just sanding, I was ready to paint. I first went over the case with 3 coats of Rustoleum primer. Once that had dried for 24 hours, I lightly wet sanded at 600 grit just to get the primer nice and smooth for painting. I then chose my colour of choice and painted 3 to 4 coats of Rustoleum matte black. And finally after another 24 hours of drying, I sprayed 3 coats Dulux matte clear coat over the paint.
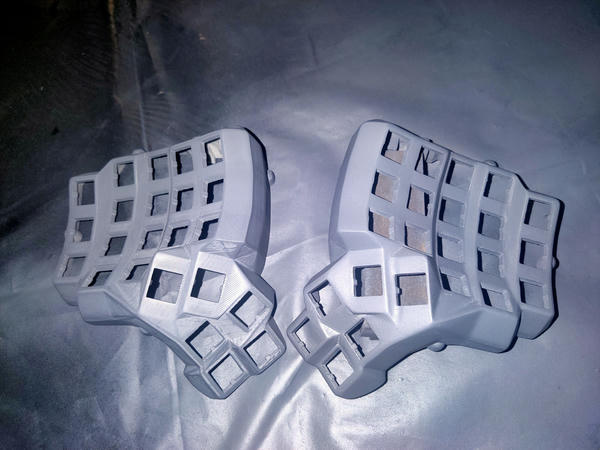
I'm pretty happy with the final result. I definetely could of sanded more but I think it was good enough for what I wanted. Now for the fun part!
The Assembly
Now that we have all the parts and the case is ready, we can start building the actual keyboard.
Wiring the Switches
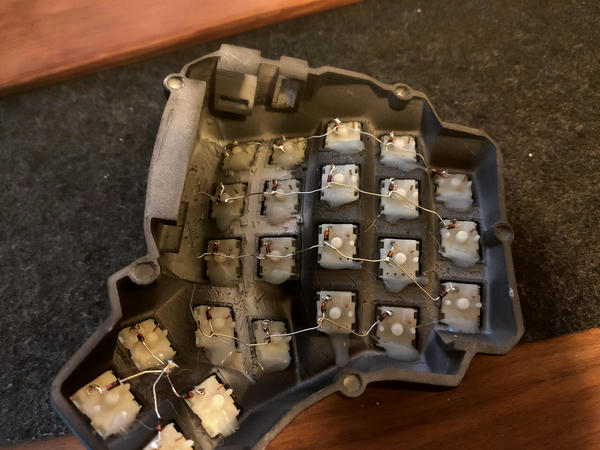
First part is easy which is putting the switches into the case. It does not matter what way they are oriented but I chose to have them upright. If you want, as an extra measure, you can hot glue the switches in just so they don't come out for some reason. My switches had a pretty tight fit so the glue probably wasn't necessary but better to be safe then sorry.
Next is wiring the rows and columns together. I followed this great diagram on abstractthat's github that shows how each row and column should be wired up. Diodes will be connected along the rows and the jumper wires connected along the columns. For the rows, I wrapped the diodes around the left pin on the switch, making sure the negative side of the diodes was facing downwards and then guided the bottom part along to the next diode. The columns were then wired along the right pin. I removed the insulation from the wire that was next to the pin to expose the copper, then I wrapped the copper around the pin and soldered it to the switch.
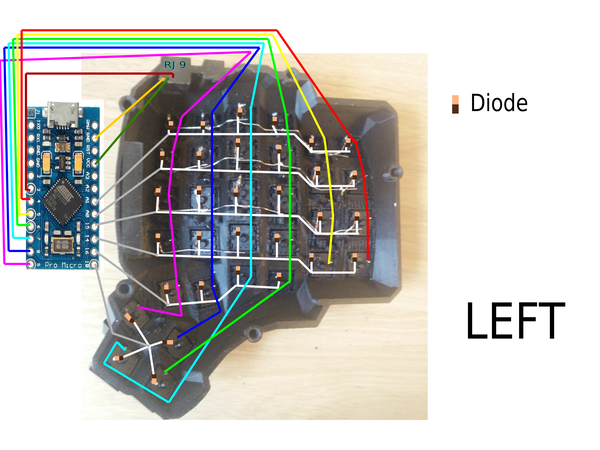
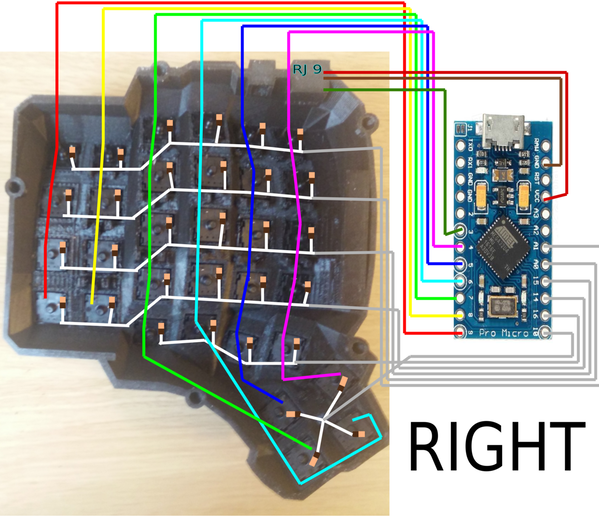
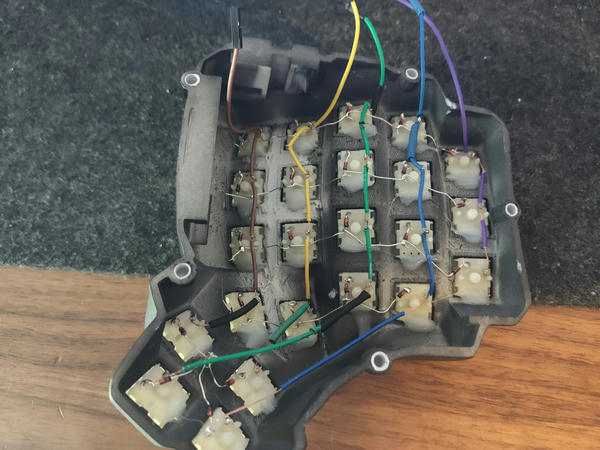
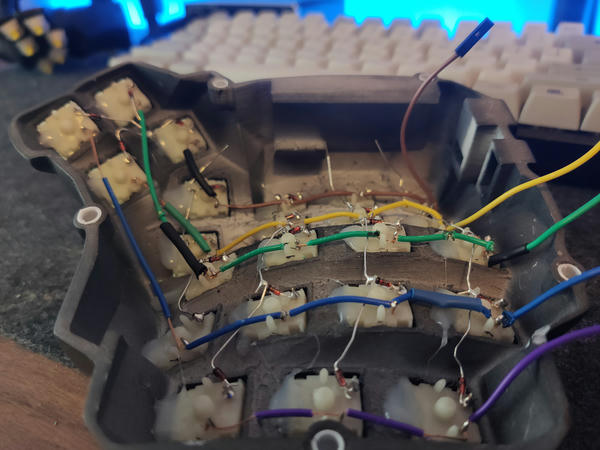
Each row and column is wired to a GPIO pin on the nice!nano. You don't have to copy the exact GPIO pin wiring in the diagram but just make sure that you change your ZMK config according to how you have wired the columns and rows.
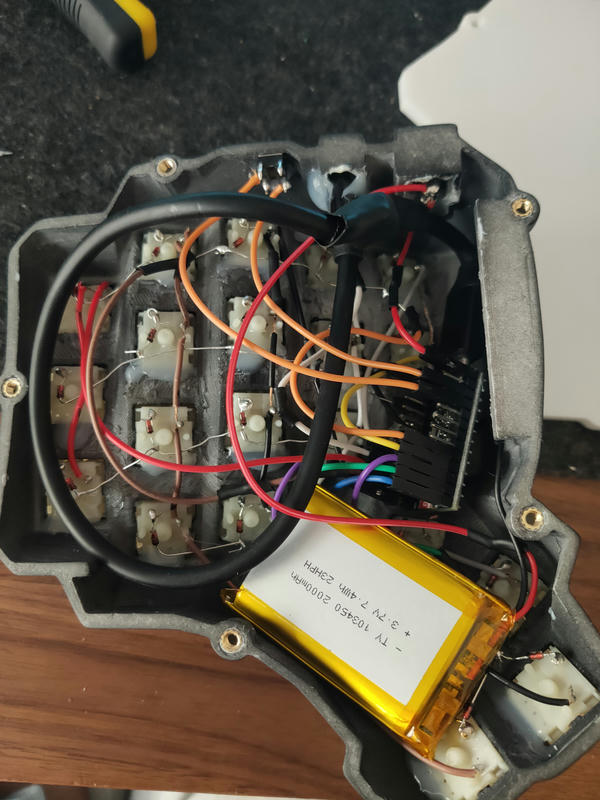
Heres what the finished product looks like. I had to cut and solder on extra wire to extend the column wires so they would reach to the nice!nano. I also soldered on some female jumper wires to the diodes so I could connect them to the header pins on the board.
The Extra Peace Of Mind Stuff
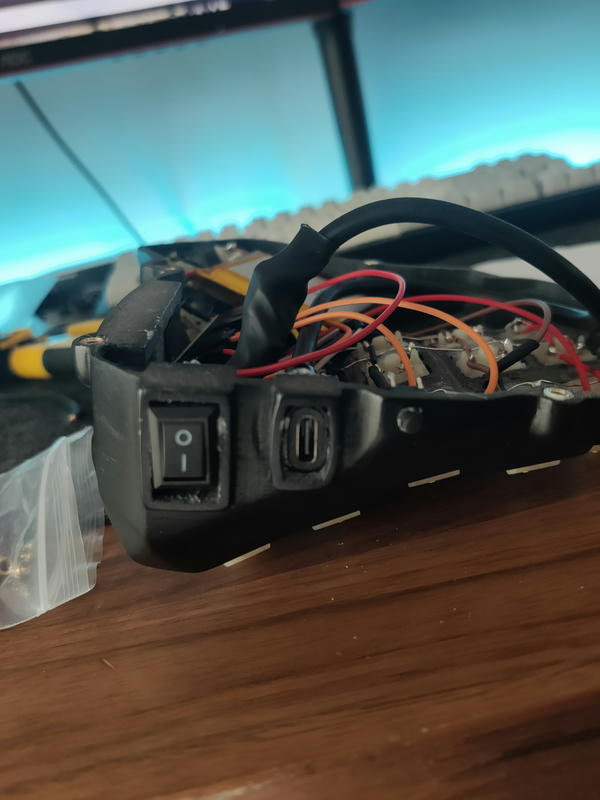
Once the columns and rows are connected to the nice!nano, its time to add in the extra parts that complete the keyboard. First things first is connecting the USB-C extension cable and glueing it into the USB slot in the case. I had to melt down the hole with my soldering iron so the cable could fit through. Then I used some hot glue to keep it in place. The cable was slightly too long for the case so I cut off about an inch and soldered it back together.
Next it was time to connect the battery. I connected the negative wire to the nice!nano and then the positive wire to a rocker switch. This part isn't necessary but it's just a quality of life feature, that way I can conserve the battery life when it's not being used. I hot glued in the rocker switch into the hole where the RJ9 connector would normally go and connected the other pin on the switch to nice!nano.
Finally, I wanted to add a reset button. This is so I don't have to open the baseplate everytime I wanted to reset the board. This part was as easy as wiring one pin on the button to the reset pin on the nice!nano and then the other button pin to ground. I had to drill a small hole in the case for the button to stick through. You can drill into the baseplate or into the case, whichever you prefer. I chose to drill my hole right next to the USB-C port.
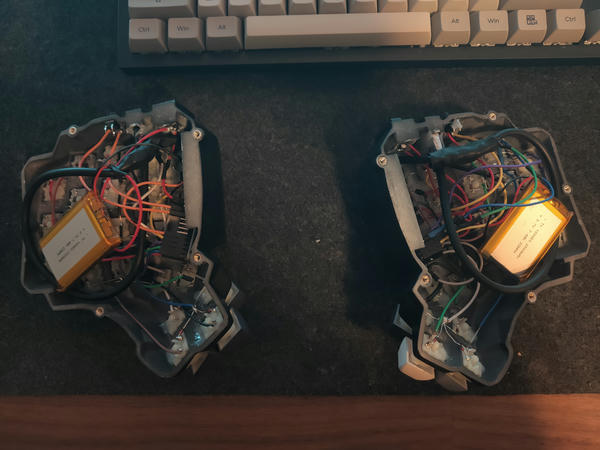
The keyboard electronics are now complete and now it was time to screw on the baseplate. I used some M3 heatsink threads and some M3 screws to screw it in. I had to 3D print a sleeve that fit into my holes on the case because they were too big for the threads that I bought.
ZMK Configuration
ZMK is an open-source keyboard firmware. This will be the software that will enable the keyboard to be a keyboard. Because the dactyl manuform is not a keyboard layout that is listed under the default keyboards that are included in the install script, I had to create a new "shield" which is essentially the development repository for the custom keyboard. It starts with setting up multiple files in the repo that correspond to different functions for the keyboard. I will outline a quick summary of each file but if you want to create or edit the configuration for your keyboard, I would suggest to read the documentation for creating a shield which can be found here.
| File | Summary |
|---|---|
| Kconfig.defconfig | Sets the default configuration variables for the keyboard |
| Kconfig.shield | Defines the shield type, whether its a split or a traditional |
| dactyl_manuform.dtsi | Defines the matrix structure of the keyboard. Also defines the row-gpio pins |
| dactyl_manuform.keymap | Defines what the keymapping for the keyboard is. This is where most of the personalisation is done |
| dactyl_manuform.zmk.yml | Configuration file for ZMK so that ZMK knows the features of the keyboard |
| dactyl_manuform_left.overlay | Overlay file to specify the column-gpio pins for the left side |
| dactyl_manuform_right.overlay | Overlay file to specify the column-gpio pins for the right side |
| dactyl_manuform.conf | Config file to set optional settings for the keyboard |
Once you have your repository completed, ZMK automatically builds your firmware files for you within Github so it's super easy to download the firmware files ready for each side of the board. To put the nice!nano in bootloader mode, you have to press the reset button twice. The board will then expose itself to your file manager. Then just drag and drop the firmware file and it will automatically reboot itself ready for use.
My repository is here if you want to fork it and use it for your own dactyl manuform build.
Linux Specific Issue (AX200 Bluetooth Controller)
I had some issues getting the keyboard discoverable to my PC. There is also an issues thread open discussing the problem here. The fix that solved it for me and for many others is to add the bluetooth experimental settings in the dactyl_manuform.conf file like so:
CONFIG_ZMK_BLE_EXPERIMENTAL_CONN=y
CONFIG_ZMK_BLE_EXPERIMENTAL_SEC=y
Once I added these settings, my connections issues seemed to be solved so your milage may vary. This seems to be only an issue for linux systems using the AX200 controller.
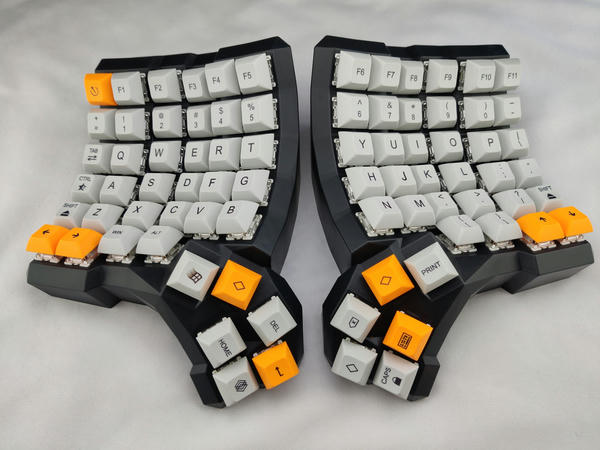
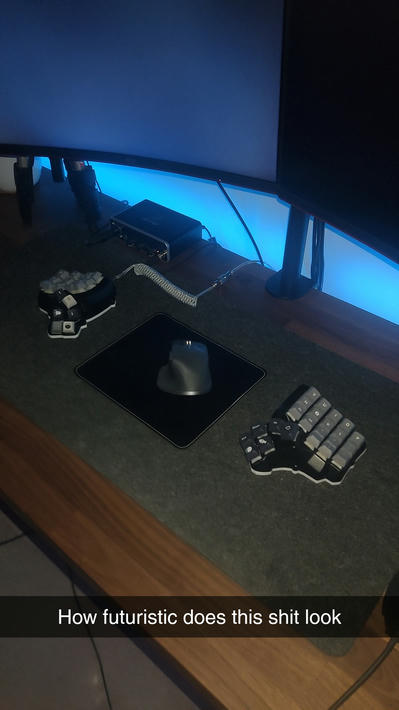
Final Result
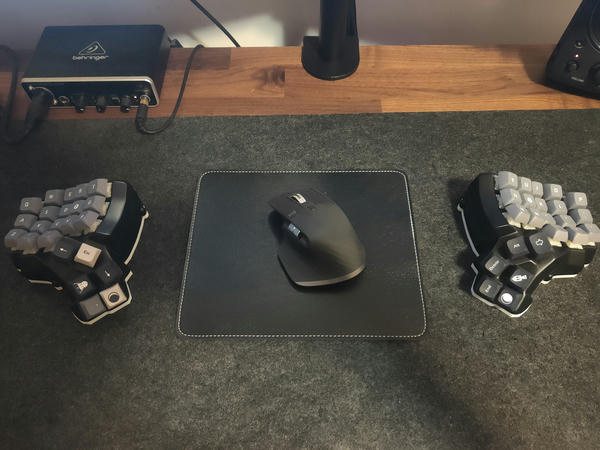
Here is the finished product. I'm very happy with how this turned out. This was my first big project that has involved my 3D printer. I've been typing on the keyboard for about 2 weeks now and my typing speed is about 70 wpm. My original average was about 95 to 100 wpm. So while I'm not as fast as my old typing speed, I have noticed that using the dactyl manuform is a much more comfortable typing experience. Pressing each key feels very natural to the hands. The main thing I need to work on is using the special characters and remembering where each one is. Other than that, I'm having a really fun typing experience and I would suggest you to try and build one yourself!
Build Log
I livestreamed myself building the keyboard for the first time. If you have any troubles or you feel more comfortable following along to a video then here is my build log.