How to rip and tag CD's PROPERLY!
Table of Contents
"Why do I need to rip CD's? I got Spotify instead..."
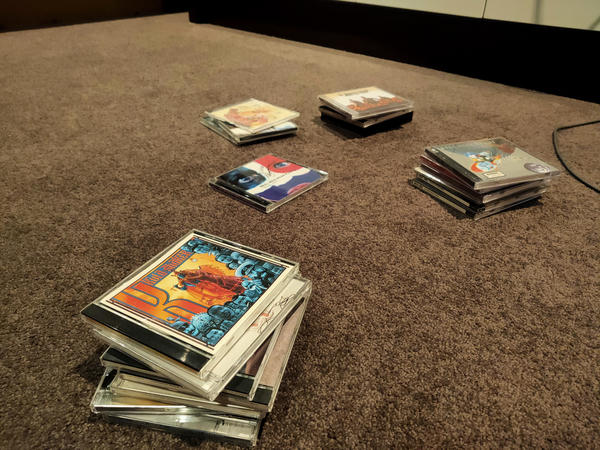
This is the opinion of most people nowadays with the adoption of streaming platforms becoming mainstream technology. While I do think it is very convenient to be able to play any song I want from my device just by looking it up. The convenience is often blinded by the fact that you dont actually own the music your listening too. If you were to stop paying for your Spotify subscription today, all of a sudden your cherished playlists with all your favourite songs are washed away. You dont own those playlists and you dont own those songs. You are simply renting them and most people dont take that into consideration. They will be eager to pay for a subscription service with the false pretence that you now own all these songs and movies. Thats where physical media comes into play.
Over the years, my family used to purchase physical CD's to listen to music. Still to this day, I can grab one of those CD's and play it even though it is 30 years old. The only problem is I have to physically grab the CD and play it in that specific room. What if I wanted to play it on my phone or even outside my house? To solve this issue, I set up a Jellyfin server to manage and store my music. That way I can play it anywhere I want.
Pro's of Physical CD's compared to Spotify:
- When you purchase a CD, you physically own it... FOREVER!
- Sound quality is much better than Spotify. Spotify uses OGG compressed formats whereas CD's offer lossless audio which you can rip into FLAC's
- No internet connection required
- CD's you pay once and done. Spotify you have to pay monthly or deal with ads
- CD's have physical artwork that just make owning the CD more personal
- No data tracking and analytics collected when listening to your own music
I will go through step by step on how I rip and tag CD's for Jellyfin on Linux. Most of the software that I suggest can run on most OS's but if it doesn't, there should be an alternative for your OS. This method I have found to be the best in terms of tagging and compatibility when it comes to importing your library into other music managing software.
Ripping the CD (abcde)
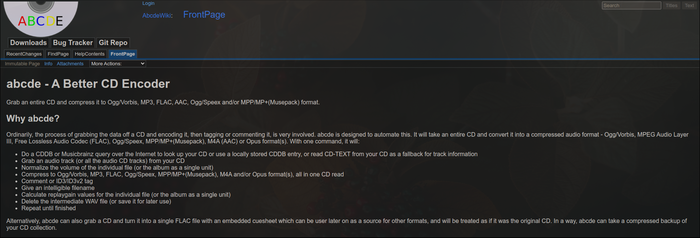
First we need to rip the CD itself. The best program I have found that does this is abcde. This software by default rips a CD as a .wav file. This is all good but with a little bit of configuration, we can get it to encode the file to a .flac for us aswell as do some basic tagging with MusicBrainz. This is very convenient because .flac is generally the standard for lossless audio if we want to have the best sound-quality without the file being too large. And doing some of the tagging for us helps us later when we need to tag each album with Picard. I think this program only works on Linux systems but if you are on Windows or Mac, you can just rip the CD with whatever software you prefer and then use ffmpeg to convert the .wav to a .flac
Installing abcde
On Arch distros, you can run the following:
yay -S abcde abcde-musicbrainz-meta
For Debian distros, you can run the following:
sudo apt update
sudo apt install abcde
Configuring abcde
Before we start ripping, we want to configure abcde to rip our music to .flac containers, tag them using MusicBrainz and store then in a designated folder. The following is a sample config file which you should place in your $HOME directory. If you wish to change the destination of where the music is saved, then change OUTPUTDIR variable:
# -----------------$HOME/.abcde.conf----------------- #
#
# A sample configuration file to convert music cds to
#       FLAC using abcde version 2.9.3
#
#         https://andrews-corner.org/abcde/
# -------------------------------------------------- #

# Encode tracks immediately after reading. Saves disk space, gives
# better reading of 'scratchy' disks and better troubleshooting of
# encoding process but slows the operation of abcde quite a bit:
LOWDISK=y

# Specify the method to use to retrieve the track information,
# the alternative is to specify 'musicbrainz':
CDDBMETHOD=musicbrainz

# With the demise of freedb (thanks for the years of service!)
# we move to an alternative:
CDDBURL="http://gnudb.gnudb.org/~cddb/cddb.cgi"

# Make a local cache of cddb entries and then volunteer to use
# these entries when and if they match the cd:
CDDBCOPYLOCAL="y"
CDDBLOCALDIR="$HOME/.cddb"
CDDBLOCALRECURSIVE="y"
CDDBUSELOCAL="y"

# Specify the encoder to use for FLAC. In this case
# flac is the only choice.
FLACENCODERSYNTAX=flac

# Specify the path to the selected encoder. In most cases the encoder
# should be in your $PATH as I illustrate below, otherwise you will
# need to specify the full path. For example: /usr/bin/flac
FLAC=flac

# Specify your required encoding options here. Multiple options can
# be selected as '--best --another-option' etc.
# Overall bitrate is about 880 kbs/s with level 8.
FLACOPTS='-s -e -V -8'

# Output type for FLAC.
OUTPUTTYPE="flac"

# The cd ripping program to use. There are a few choices here: cdda2wav,
# dagrab, cddafs (Mac OS X only) and flac. New to abcde 2.7 is 'libcdio'.
CDROMREADERSYNTAX=cdparanoia

# Give the location of the ripping program and pass any extra options,
# if using libcdio set 'CD_PARANOIA=cd-paranoia'.
CDPARANOIA=cdparanoia
CDPARANOIAOPTS="--never-skip=40"

# Give the location of the CD identification program:
CDDISCID=cd-discid

# Give the base location here for the encoded music files.
OUTPUTDIR="$HOME/Music"

# The default actions that abcde will take.
ACTIONS=cddb,playlist,read,encode,tag,move,clean

# Decide here how you want the tracks labelled for a standard 'single-artist',
# multi-track encode and also for a multi-track, 'various-artist' encode:
OUTPUTFORMAT='${OUTPUT}/${ARTISTFILE}-${ALBUMFILE}/${TRACKNUM}.${TRACKFILE}'
VAOUTPUTFORMAT='${OUTPUT}/Various-${ALBUMFILE}/${TRACKNUM}.${ARTISTFILE}-${TRACKFILE}'

# Decide here how you want the tracks labelled for a standard 'single-artist',
# single-track encode and also for a single-track 'various-artist' encode.
# (Create a single-track encode with 'abcde -1' from the commandline.)
ONETRACKOUTPUTFORMAT='${OUTPUT}/${ARTISTFILE}-${ALBUMFILE}/${ALBUMFILE}'
VAONETRACKOUTPUTFORMAT='${OUTPUT}/Various-${ALBUMFILE}/${ALBUMFILE}'

# Create playlists for single and various-artist encodes. I would suggest
# commenting these out for single-track encoding.
PLAYLISTFORMAT='${OUTPUT}/${ARTISTFILE}-${ALBUMFILE}/${ALBUMFILE}.m3u'
VAPLAYLISTFORMAT='${OUTPUT}/Various-${ALBUMFILE}/${ALBUMFILE}.m3u'

# This function takes out dots preceding the album name, and removes a grab
# bag of illegal characters. It allows spaces, if you do not wish spaces add
# in -e 's/ /_/g' after the first sed command.
mungefilename ()
{
  echo "$@" | sed -e 's/^\.*//' | tr -d ":><|*/\"'?[:cntrl:]"
}

# What extra options?
MAXPROCS=2                              # Run a few encoders simultaneously
PADTRACKS=y                             # Makes tracks 01 02 not 1 2
EXTRAVERBOSE=2                          # Useful for debugging
COMMENT='abcde version 2.9.3'           # Place a comment...
EJECTCD=y                               # Please eject cd when finished :-)
Running abcde
It's super simple to run. All you do is insert your CD into your disc drive and then run abcde in your terminal. If MusicBrainz finds tags for your CD, it will prompt you to select which version. It will then ask if you want to edit the tagging data. I normally pick no even if the album is not automatically detected as we will be using MusicBrainz Picard later to fully tag the music. It will then prompt if it's a multiartist album and then thats it. In a few minutes you will have your music ripped off your CD!!!
Tagging the files
The current standard for tagging music is to use MusicBrainz database. This is an open-source database where anyone can contribute the metadata for albums. Most of my CD's that I own have been in this database. If for some reason yours isn't, you can always contribute your album to the database. That way once it's in you can use your album release to tag the .flac's you just ripped aswell as allowing other people to use your release to tag their music.
MusicBrainz convientaly has a program called Picard which we will be using to tag our albums using their database.
Installing Picard
Picard can be installed in pretty much every OS. Instructions for your OS can be found on this page.
Configuring Picard
After lots of tinkering and finding the right way to tag music efficiently, these are the current settings I use inorder for your music to be imported correctly by music managing software such as Jellyfin or Navidrome.
Accounting for Multiple Artists
Firstly, we want to make sure multiple artists are handled correctly. By default, Picard does not tag multiple artists in a way that is handled smoothly by Jellyfin. If you use Picard's defaults, you will have lots of artists labelled:
Barry White feat. John Smith
Elton John feat. Queen
Instead of having one artist labelled as multiple artists, we instead want to split them up so we have two seperate artist profiles that are linked to one song. To do this, go to Options then Scripting. Enable Tagger Scripts and create a new script that contains the following:
$set(_artists,%artists%)
$unset(artists)
$setmulti(artist,%_artists%)
$setmulti(artistsort,%_artists_sort%)
$setmulti(albumartist,%_albumartists%)
$setmulti(albumartistsort,%_albumartists_sort%)
This will tag the artist and album artist with a ; seperator in order for Jellyfin to distinguish that the track has two artists. Here is an example of what is should tag like:
Elton John; Melbourne Symphony Orchestra
Using Artist Locales and fixing artists with multiple names
There are some cases where certain artists will have non-english letters in there name or they will go through a name change. This can lead to artists not being in english aswell as artists that are the same but have multiple artist profile for each name, for example "The Jacksons" and "The Jackson 5" being two seperate artists.
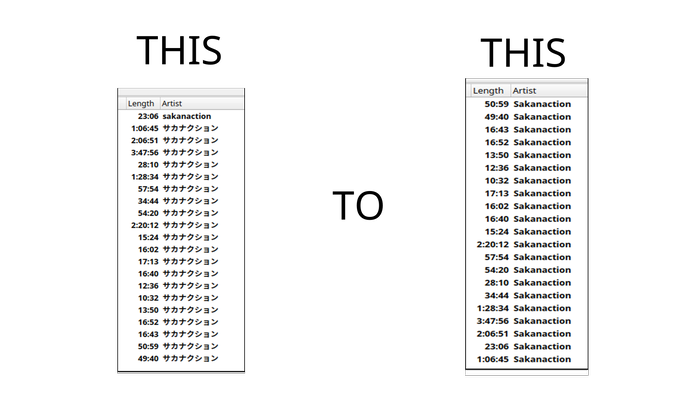
To fix this, go to Options then Metadata. Enable Translate artist names to these locales where possible and select English. Then enable Use standardized names.
This will ensure that the artist name will always be in english as well as avoiding duplicate artist profiles with different names.
Tagging Genres
By default, Picard doesn't do a very good job with tagging genres. There are lots of occurrences where albums will having missing genre tags or albums will have random tags that make no sense. Luckily, we can install some built in plugins that improves the tagging for genres. The plugin I found to be the best is the "Wikidata Genre" plugin. Keep in mind that enabling this plugin will heavily slow down loading albums into Picard. This is because Picard has to grab extra tagging data from the Wikidata API. If you're okay with waiting a little longer for Picard to load the metadata for albums then use this plugin to get better genres. Otherwise you can skip this option.
You can install this plugin by going to Options then Plugins. Then you can download "Wikidata Genre" from the plugins list. This will heavily improve the tagging for genres to ensure that your music collection is tagged consistently. This plugin helped clean up my disgusting genre section in Jellyfin to be much more user-friendly to navigate.
Downloading cover art
Cover art is an essential if you want your music library to look clean and legitimate. The following steps will enable Picard to download a cover.jpg file and place in the album folder aswell as imbedding the cover art into the music files.
To achieve this, go to Options then Cover Art. Enable Embeded cover images into tags, Save cover images as seperate files, Overwrite the file if it already exists and Save only a single front image as seperate file.
File Naming and Folder Structure
The structure that Jellyfin prefers when it reads music is as follows:
Music
├── Some Artist
│   ├── Album A
│   │   ├── Song 1.flac
│   │   ├── Song 2.flac
│   │   └── Song 3.flac
│   └── Album B
│       ├── Track 1.m4a
│       ├── Track 2.m4a
│       └── Track 3.m4a
└── Album X
    ├── Whatever You.mp3
    ├── Like To.mp3
    ├── Name Your.mp3
    └── Music Files.mp3
Once your music is structured as follows, I prefer to have the music renamed so that it is identifiable and organised. My preference for naming structure to name each track by [discnumber]-[track_number] [title]. Here is an example:
.
├── 01-01 Sixty Years On.flac
├── 01-02 I Need You to Turn To.flac
├── 01-03 Greatest Discovery.flac
├── 01-04 Tonight.flac
├── 01-05 Sorry Seems to Be the Hardest Word.flac
├── 01-06 The King Must Die.flac
├── 01-07 Take Me to the Pilot.flac
├── 01-08 Tiny Dancer.flac
├── 02-01 Have Mercy on the Criminal.flac
├── 02-02 Madman Across the Water.flac
├── 02-03 Candle in the Wind.flac
├── 02-04 Burn Down the Mission.flac
├── 02-05 Your Song.flac
├── 02-06 Don’t Let the Sun Go Down on Me.flac
└── cover.jpg
To achieve this in Picard, go to Options then File Naming. Enable Rename files when saving then Edit file naming script.... Create a new script with the following:
$if2(%albumartist%,%artist%)/
$if(%albumartist%,%album%/,)
$if($gt(%totaldiscs%,1),$num(%discnumber%,2)-,)$if(%tracknumber%,$num(%tracknumber%,2) ,)
%title%
Using Picard
Now that you're all set up, you can now import your albums that you have ripped into Picard. Follow these steps in order to tag your music correctly:
- "Cluster" the Albums
- "Lookup" the album metadata. If detected by Picard, it will automatically make it available for tagging
- If the album has not metadata, then "Scan" the audio fingerprint
- If still not detected them lookup manually in a browser. (If not in MusicBrainz database, look into adding it yourself)
- Double check every album is using the correct release. Do this by right-clicking on the album and then hovering "Other Versions"
- Make manual adjustments to songs if necessary (Most of the time this is unneccessary)
- Save changes
Your music is now tagged and ready to be used with a music managing software like Jellyfin or Navidrome
How I listen to my music everywhere
Currently, I use Jellyfin to store and manage my tagged music. I can access the website everywhere even outside my home. You can listen to your music either in your browser or you can pare your Jellyfin instance to a client on each device.
Mobile phone listening
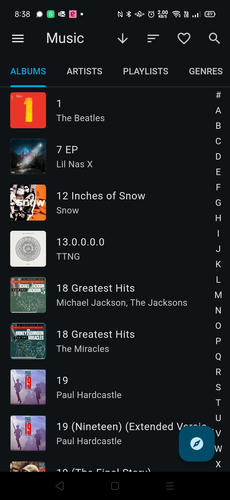
For listening to my music on the go, I use Finamp to connect to my Jellyfin instance. It's fast and efficient and if I don't want to stream the music over the internet, I can choose which albums to download onto local storage
Listening around the house
Because I am running a home assistant instance for all my smart devices, I opted to use a music client which can stream my Jellyfin instance to my Sonos speakers through the house. Music-Assistant is great for this. I installed it onto home asssitant, then configured it to connect to my Sonos speakers and to Jellyfin and now I can listen to my music through Sonos without using their proprietary app which over the recent months has been quite controversial. And with the power of automations, I can automate to play music on my speakers at certain parts of the day!
Here is a video showcasing that:
