
Building a DIY e-Board (Powered by Liboard)
Table of Contents
Chess
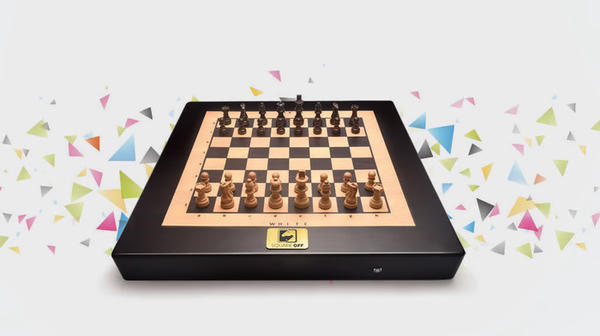
Recently I got back into playing chess online. I hadn't played in a few years and when I did, it was mainly casually. I would play a couple games if I was bored and that was that. As I was playing over these past few weeks, I wondered if there was a way to play online chess over the board. I've seen products like Square-off, which is an automatic chessboard where the pieces move for you. But it is very expensive and you still can only pre-order the product even though it's been almost 10 years since it started its kickstarter campaign.
When I was younger, my uncle taught me how to play chess. I learnt the fundamentals and ended up joining my primary school chess club. I loved competing in interschool because it was a way for me to compete over the board. I loved physically picking up the pieces and viewing the game from an over-the-board perspective rather than computer chess which is mainly in a 2D layout. If only there was an affordable way to play on a physical board with people online. After doing some research, I came across a product called DGT chessboards.
DGT Boards
A DGT board is an electronic chess board that connects to a computer to record in real-time the piece movement made by players during a game. These boards are often used in tournaments to monitor or broadcast the game. You can connect these boards to websites like Lichess to use them as input devices. That way you can play online against other players over a physical board.
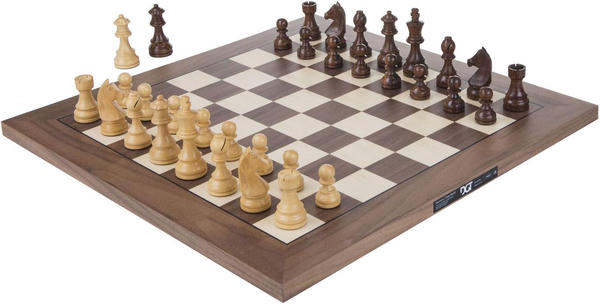
The only downside to these boards is that they can cost a lot of money. The cheapest board I could find was a Bluetooth e-board from DGT. But the size of the pieces and the board are much smaller than a tournament style chess board. If you wanted one that is closer to tournament style like this Wooden Smart Board, it can cost you over $900!
Due to not wanting to fork out $900 dollars over a chessboard, I thought, surely there is a way I can build one myself right?
Liboard
That's when I came across this cool project Liboard, which is a DIY electronic chessboard which uses photoresistors to determine where each piece is on the board. You can connect the board to a computer and play Lichess games online through the Lichess API which is exactly what I wanted. The project provides a wiring schematic and images of the build along with a materials list. This materials list was significantly cheaper than purchasing a DGT board, with it only costing around $50. So I ordered all the parts from Aliexpress and set out to build it!
Here is a parts list for people who are curious about building there own:
| Part | Quantity | Price | Description |
|---|---|---|---|
| Arduino Pro Micro | 1x | $10 | The microcontroller that will control the logic |
| SN74HC595N Shift Register | 1x | $4 | Used to account for lack of analog pins on Pro Micro |
| Photoresistors | 64x | $8 | Used to detect if square is occupied by piece or not |
| Copper Wire Kit | 1x | $18 | Wires to connect things |
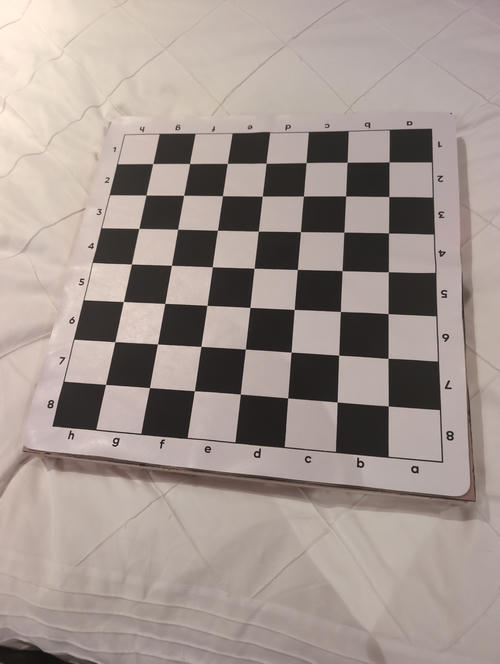
| Chessboard Vinyl Mat | 1x | $7 | Self explanatory |
| PCB Prototype board | 1x | $4 | We will be wiring all the circuitry for the Pro Micro on here |
| 1N4148 Diodes | 72x | $6 | Necessary for the photoresistors to function. Also wired to the shift register column outputs |
| 100k Resistors | 8x | $3 | Wired between the row outputs |
| 32 Chess Pieces | 1x | $9 | Any chess pieces will do. Get a nice one to pair with your board |
Building the Structure
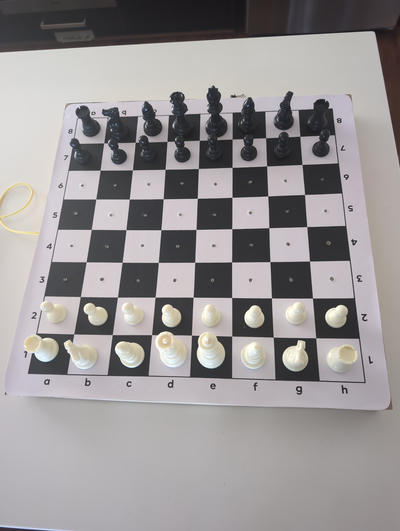
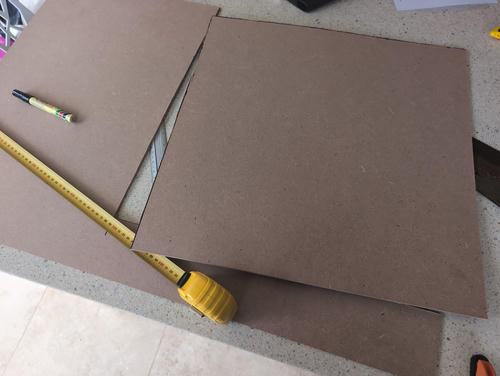
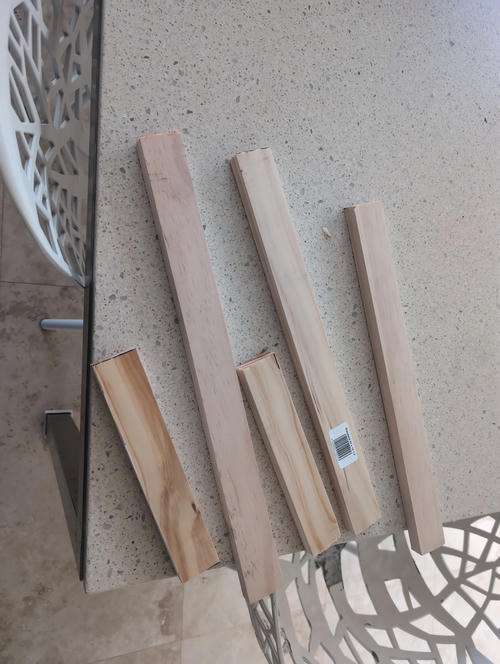
I opted to build the simplest chess board that was mainly function over looks. I went to Bunnings and bought the cheapest wood I could get. It cost me a total of $15 for some 3x4's and some plywood. I cut the structure and glued it together. Once the main structure was done, I glued the vinyl chess mat on the top. And then finally drilled a hole through each square for the photoresistors.

Wiring
The wiring is fairly straightforward if you have experience with basic soldering skills. It follows a simple matrix wiring structure. I started with placing photoresistors in each of the holes that I drilled. Then I soldered diodes to one end of each photoresistor. Then solder a wire that is connected to each diode for the rows and a wire that is connected to each photoresistor for the columns. You will then get something that looks like this.

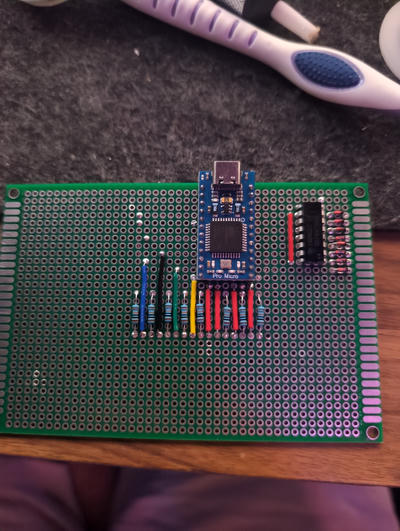
Circuit Board
The main circuitboard consists of the Arduino Pro Micro, a shift register and some resistors. I basically just copied one to one the wiring of the diagram that Philipp provided on the Liboard website. Essentially, the columns are wired to the shift register which is connected to the Pro Micro's analog pins and the rows are wired to directly to the Pro Micro analog pins with some resistors.

Flashing the Firmware
The Arduino library for Liboard is provided here. Basically how it works is, the code periodically scans each square on the chessboard to determine if it is occupied by a piece or not. It figures this out by reading the photoresistor value and comparing it to a threshold value. If the value is underneath the threshold (meaning the photoresistor detects little to no light), then it's occupied. Once it has read the values of each column, it sends a 64-bit binary integer to Serial that outlines which squares are occupied. Then depending on your usecase and environment, you would have software that read these values and interpret the game state.
Once you have flashed the Pro Micro with the serial_binboard.ino file, you should test that your Liboard works with these Python scripts. The first script you should run is bitboard.py. This program shows what squares are currently occupied. It will display a grid like structure that will mimic the board state. If it doesn't seem to be working, try adjusting the THRESHOLD value in the serial_binboard.ino file to account for your lighting environment and photoresistor sensitivity.
Increasing the functionality of Liboard
After using Liboard for a couple days, I noticed that as the day would go by, I would have to manually adjust the THRESHOLD value to account for the changes in lighting. This became a bit annoying as I would have to manually calibrate the sensors every time I wanted to play. So, I decided to create a PR that enables you to calibrate the thresholds programmatically instead of manually.
I first started with editing serial_binboard.py to implement a few new features. Instead of having one global threshold value that is set for all photoresistors, I made it so you can also choose to set an individual threshold for each photoresistor. I needed this feature as the photoresistors I installed in my board were all different and had different measurements and sensitivities. I also added "commands" that the user can send through the serial monitor. These commands show things like, the current photoresistor readings for each square, the current threshold that has been set and a "calibration mode" which reads the input from the serial and assigns the value as the new threshold without manually uploading the firmware every time.
The next step was to create a calibrate_thresholds.py script that will walk the user through the calibration process. It starts by asking the user to clear the board to obtain the "empty" value for each square. It then asks the user to place pieces on each square to work out the "occupied" value. It then picks the midpoint and applies the threshold to the board. This script is especially useful because it avoids users ever having to go back into the Arduino IDE and messing around with threshold values.
As of writing this, my PR has not been merged into the main branch, but you can still try it out by using my branch instead: https://github.com/LiBoard/Python/pull/4.
calibrate_thresholds.py demo
Liboard Demo
Here is a video of the board in action. I am running the board_api.py script which connects to the Lichess API. I then can play Rapid or Classical games on the board. It works by just simply moving my piece to where I want it, then moving my opponents piece when they have played there move.
The Future
While the chessboard functions almost flawlessly, it doesn't look that great aesthetically. At some point in the future, I want to make a new board that has similar components, just a different design. I think I would use reed switches with magnets in each piece for the square occupation mechanism instead of photoresistors, that way I don't have to recalibrate the sensors every time the light conditions change. One project I found that gave me some inspiration is this design by Olivier Mercier.
He used a preexisting chessboard that he bought off of Amazon and modified it to behave like a DGT board. Building something like this seems more elegant and refined. It's much more clean and you wouldn't even know its an electronic chessboard unless you flipped it over. I'll make another blog post about the new board I build once I get to it.